
After the success of the Winter Deer Aprons in 2013 I had planned to do a version with Santa heads, but when researching vintage Santa images I got distracted by doves and, as always, an idea got fixed in my head that I couldn’t shake. One of the first things I did was to buy some fabric. Again, I had VERY specific plans and knew I wanted something gold and patterned, with a vintage vibe. What I didn’t know I wanted was THE most expensive silk damask available, unfortunately, I fell in love with it so nothing else would do. Joel and Son supply the Queen…apparently….I’m not surprised as I doubt anyone else could afford to shop there, beautiful though their fabric is.
 After getting over the shock of the fabric price (my own fault entirely, I could have gone with manmade damask but it just wouldn’t have been the same as sumptuous silk), I got to work planning the placement of the dove I’d already designed. I scanned some of the fabric so I could understand how it would actually look and help see the edge stitching more accurately. I can get a bit disappointed with my head image and reality when doing applique pieces, as I tend to forget how the edge stitching will change the look of the finished item.
BTW, in a totally off-topic aside, I can highly recommend the HP Instant Ink plan for anyone who spends half their life printing out their kids’ homework. You pay a set fee per month and they make sure you always have ink by sending it out in advance, it’s saved us loads and I no longer stress about printing colour over black and white as I pay for a set number of pages regardless of the format.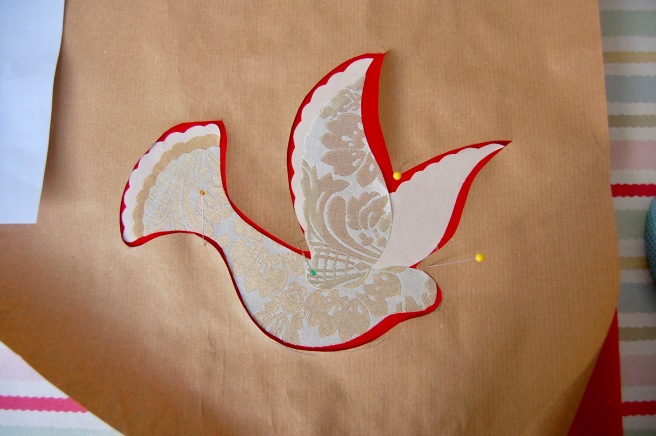 Back to doves. I remember I’d planned to take photos of the dove at each stage of the making process, in the same position, and I clearly started out well.
 Before I then forgot.
 Still, I’m quite surprised that I took so many photos as I often get too involved in the sewing to remember.
  It might not appear impressive, but all that neat zigzagging on the edges and wings took FOREVER and there are multiple scallop lines on the wings with various gold threads…again difficult to see in photos.
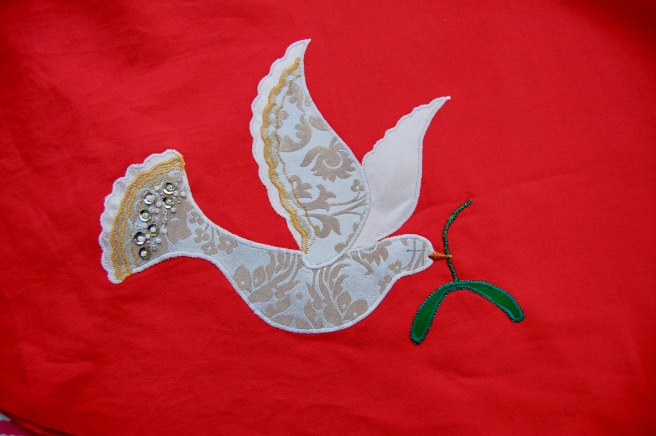
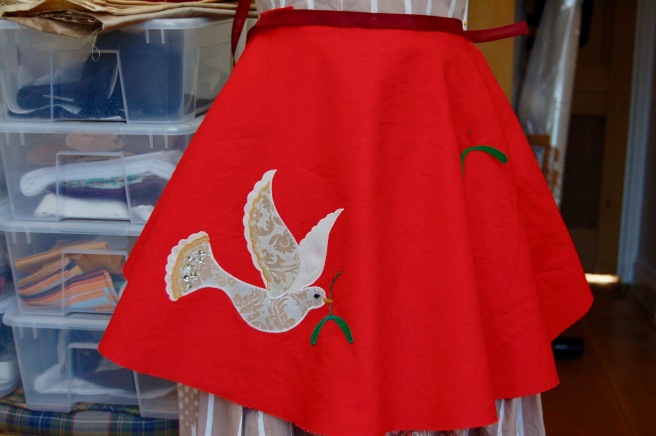 I spent some time deciding on the bias binding colour. I was originally thinking gold but it looked a bit drab in real life and in the end I went with a dark, wine red. I also considered the second piece of mistletoe but abandoned that, too.
 At this point, I decided they needed more bling so extra sequins and beads were sewn onto the wings.
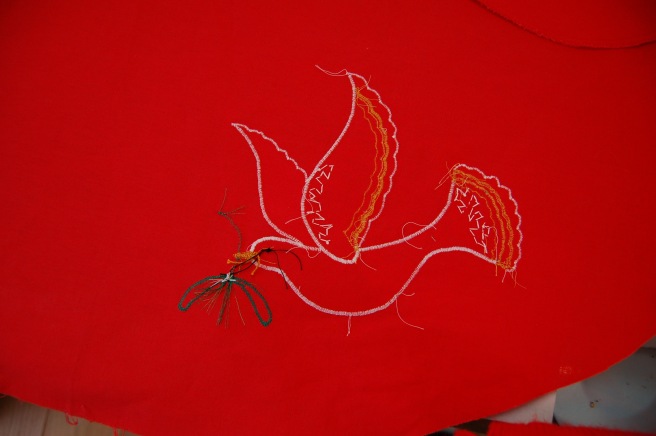 Back shot!
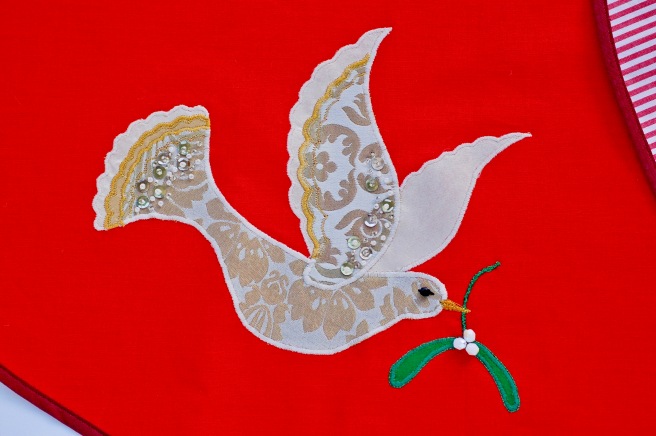 And finished dove, with mistletoe as that’s what I liked the most (I tried holly and an olive branch).
 The truth is that I completed these in December, last year, but I just didn’t get them photographed in time. Red is always hard to capture, but especially so in winter light and I am not the best photographer around.
 Even then, I completely forgot to take images this summer and I have just spent a frantic day doing my best in really crappy, grey light. But, as above, it’s always amazing what you can do in Photoshop to edit the colours. Sadly, the blue/grey background above was beyond saving so I had to add a new one and a terrible fake shadow.
 And here is another example of an entire day of using the Photoshop eraser and altering the colours. One of this Summer’s stunning, cunning plans was to set up specific places for taking photographs and to that end, I bought some beautiful, brass dragonfly hooks, only there isn’t enough room by the door (the only spare bit of wall!) to get a square image without the door frame being in – Doh!
 So more Photoshop with dodgy shadows. I need to cover or remove the black plastic parts of the hanger too….gold glitter and a glue gun??
 MORE cutouts. I had finger fatigue by the end of the day.
 But they get the images across and I could easily spend hours and hours trying to edit and photograph products; as it was this took me an entire day (including listing them in my shop and Folksy) so they will have to do.
I’m really happy with the finished aprons though, they worked out exactly as I’d imagined and I wore mine for the first time last year for all my Christmas cooking. I’ll be getting it out again on Sunday to make the pudding and will enjoy wearing it on the big day itself as I do enjoy putting on a pretty apron and pretending I’m a domestic goddess 🙂

Hey dear Beth,
your dove aprons are fabulous! Love there festive colours and the beading is beautiful 🙂 Looks like so much work goes into them, with all the process shots but well worth it as they look like such quality pieces. Good luck with your Christmas prep, sounds like your very prepared with it all, love Safxxx
Thanks Saf, really glad you like them. Hope you have a lovely Christmas. Bxx
as always Beth…..fabulous! 🙂
Thanks V. Hope you have a lovely Christmas. Xx
Beautiful. What neat satin stitch!
Thank you 🙂
Totally stunning. I love hearing about the process too. Thank you for sharing.
Thanks Cat – glad you enjoyed the post. Merry Christmas to you!
So beautiful…
Thank you. Merry Christmas!!
THese are beautiful (as always!) Beth. I love the brocade. I have a mini bolt of some sort of silk / satin brocade with gold thread that my mum made an evening coat from back in the 70s. I wonder if it came from Joel and Son? It’s the most beautiful fabric I’ve ever seen but I’m terrified to use it! I did line a bag with it once, but I’m still waiting for the right project!
Lovely to hear from you Nicky. I have some of my Mum’s lace she used on her Wedding dress, she was very precious about using it so I daren’t cut into that either! Hope you and yours have a lovely time of the festive season.